
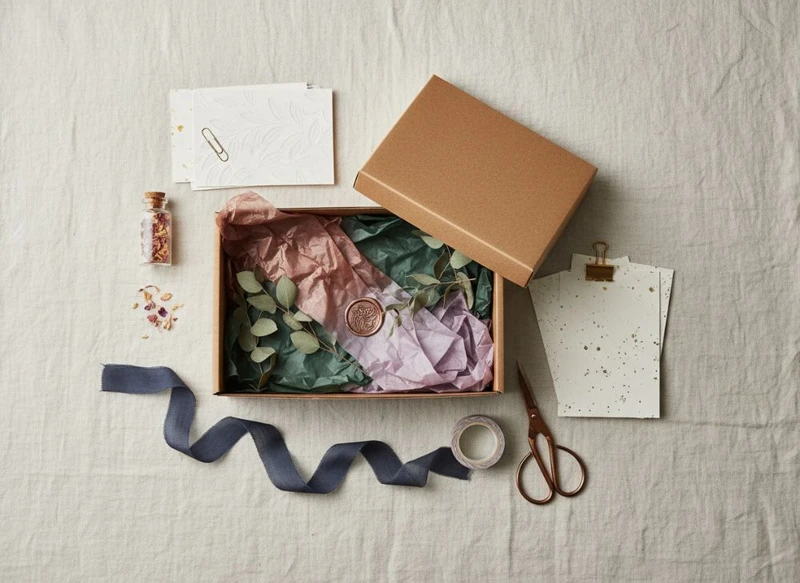
Successful gift packaging balances visual impact with practical production decisions. Before approving artwork, define the recipient experience, protect the product, choose materials that suit the use case, and test a complete packed sample rather than judging the box alone.
This ultimate checklist for perfect gift packaging design and production helps South African brands, retailers and product teams turn an initial concept into packaging that is consistent, presentable and realistic to assemble at scale.
Defining Your Gift Box Aesthetic and Mood
Start with the purpose of the gift, the recipient and the moment of opening. A corporate thank-you gift, a premium retail product and an online order may all require gift packaging, but their visual priorities can be very different.
Write a short creative brief before selecting colours or finishes. It should answer:
- Who will receive the package?
- What should they feel when they see and open it?
- Is the item intended for retail display, direct delivery, events, seasonal gifting or internal distribution?
- Does the box need to feel luxurious, playful, understated, natural or celebratory?
- Which existing brand elements must appear, such as the logo, colours, typography or product imagery?
- Will the outer packaging be reused, photographed or shared on social media?
A clear mood direction prevents conflicting choices later. For example, a minimal premium box can rely on a restrained colour palette, tactile paper and carefully placed foil detail. A celebratory gifting range may suit bolder colour, patterned tissue and a branded tag. Both approaches can work, but mixing too many finishes, colours and messages often makes packaging look unfocused.
Build a hierarchy for the artwork
Gift packaging has limited space. Give the most important information priority rather than trying to use every panel as advertising space.
A practical hierarchy is:
- Brand name or logo
- Product or gift range name
- A concise message or occasion cue
- Essential product, handling or legal information where required
- Supporting design elements, such as patterns, illustrations or social details
Keep the opening experience in mind. The lid, front panel, inner message and product reveal can each carry a different part of the story. An interior print may add value, but only when it supports the experience and remains legible after folding.
Check colour and finish expectations early
Printed colour can vary according to the substrate, print method, lighting and finish. If a precise brand colour matters, supply approved colour references and request a production-representative proof or sample. Do not assume that a colour viewed on an uncalibrated screen will match the final box.
Special finishes need equally careful consideration:
- Matt lamination creates a smooth, low-sheen appearance but can show scuffs on some dark designs.
- Gloss lamination makes colours appear more vivid and offers a shiny surface.
- Foil stamping adds contrast and a premium accent, but fine details may not reproduce well.
- Embossing or debossing adds tactile interest, though it may affect artwork on the reverse side of a panel.
- Spot UV creates selective shine and works best where the contrast is intentional.
- Uncoated stock can feel natural and tactile, but ink may appear less saturated than on coated material.
Use finishing sparingly. One well-chosen detail generally has more impact than several competing effects.
Finalising Structural Design (Size, Style)
A visually appealing box that is difficult to pack or does not protect the contents is not finished packaging. Structural design should begin with the actual product, not estimated dimensions from a specification sheet.
Measure the product’s length, width and height, including caps, handles, protruding parts, bundled components and protective wrapping. Then determine how much clearance is needed for easy packing and for any insert, tissue, filler or instruction card.
Select a box style that suits the product and workflow
The appropriate structure depends on presentation, product weight, protection needs, storage constraints and the number of packing steps.
| Box style | Best suited to | Key consideration |
|---|---|---|
| Rigid two-piece box | Premium gifts, sets and presentation-led products | Takes more storage space and may need separate lid and base handling |
| Magnetic closure box | High-end gifting and reusable presentation | Confirm closure strength and whether the structure is supplied assembled or flat |
| Folding carton | Lightweight products and retail-ready packaging | Requires a design that folds cleanly and supports the product |
| Mailer-style box | E-commerce gift sets and direct-to-recipient packs | Consider the need for an outer shipping carton and internal protection |
| Sleeve and tray | Products needing a reveal effect or added layering | Ensure the sleeve slides smoothly without being loose |
| Drawer box | Curated gift sets and products with a premium reveal | Account for the pull tab, drawer friction and internal fit |
Choose the structure before final artwork is completed. Dielines, crease positions, glue areas and closures all affect where logos, text and patterns can sit.
Allow for inserts and movement control
If the product can move inside the box, it can arrive looking untidy even if it is undamaged. Use inserts, dividers, trays, tissue or filler according to the product’s shape and weight.
Common options include:
- Folded board inserts for lightweight items
- Paperboard dividers for multi-item gift sets
- Die-cut inserts for products requiring a defined position
- Tissue wrapping for surface protection and a softer reveal
- Filler for irregularly shaped or loosely packed items
Confirm that the insert material does not scratch, stain, compress or react with the product. This is especially important for coated surfaces, glass, cosmetics, food-contact items and products with delicate finishes.
Avoid the most common sizing errors
A box should not be designed around a “snug fit” without accounting for real packing conditions. Problems often arise when teams overlook:
- Product tolerances between batches
- Wrapped versus unwrapped product dimensions
- The thickness of tissue, labels and inserts
- A product that needs to be lifted out easily
- Seasonal changes to bundled contents
- Storage of flat-packed versus assembled boxes
- Outer carton requirements for shipment
Ask for a blank structural sample before committing to printed production. Pack the real contents into it and assess opening, closure, product removal and presentation.
For brands comparing styles and formats, a range of custom packaging boxes can provide a useful starting point for defining the structure to specify.
Choosing Premium Paper Box Materials
“Premium” does not mean the heaviest or most expensive material. It means the material supports the intended look, handling requirements and product protection without adding unnecessary complexity.
Your choice normally involves the outer wrap or printed board, the box construction, internal components and any protective layer. Consider the whole system rather than selecting paper only by its appearance.
Compare material characteristics
| Material approach | Strengths | Watch-outs |
|---|---|---|
| Coated paperboard | Crisp print, strong colour reproduction and broad finishing options | May show fingerprints or scuffing depending on colour and finish |
| Uncoated paperboard | Natural, textured and understated appearance | Fine detail and solid colours can appear differently from coated stock |
| Rigid board with printed wrap | Substantial feel and refined gift presentation | Adds bulk and needs careful wrap alignment |
| Corrugated board | Useful for protection and mailer structures | Surface print and edge appearance may not suit every premium concept |
| Recycled-content paper stocks | Can support a more natural design direction | Shade, fibre texture and print results can vary; approve a physical sample |
Material selection should be tested against the product’s weight and intended journey. A lightweight skincare gift set may need a different solution from a glass product or a multi-piece corporate gift.
Specify the details that affect production
When requesting a quotation or sample, record more than the box dimensions. A useful specification includes:
- Internal dimensions in millimetres
- Box style and opening direction
- Material and board construction, where known
- Print coverage and number of print areas
- Colour references and finish requirements
- Foil, embossing, windows, ribbons or other additions
- Insert type and quantity of compartments
- Whether boxes are delivered flat or assembled
- Pack quantity and outer-carton requirements
- The product weight and any special protection needs
If packaging will be used with food, cosmetics, children’s products or regulated goods, verify the applicable South African requirements with the relevant qualified adviser or authority. Material suitability, labelling and product-contact obligations vary by product category and should not be assumed from a general packaging specification.
Integrating Branded Label Stickers and Tags
Stickers and tags can add a flexible branded layer without changing the main box artwork. They are particularly useful for limited editions, seasonal messages, product variants, personalisation and campaign bundles.
A well-designed label should look intentional, not like a late addition. Match its typography, colour treatment and finish to the box design while keeping the message short enough to read quickly.
Choose the right format for the job
- Seal stickers can hold tissue closed, secure a sleeve or add a tamper-evident visual cue where appropriate.
- Product labels can carry variable information, batch details or changing product names.
- Thank-you stickers add a personal touch to inner wrapping or cards.
- Hang tags work well for ribbons, handles and gift sets where a physical tag suits the presentation.
- Promotional stickers can identify a seasonal set without redesigning the core packaging.
Adhesive selection matters. Confirm the surface the sticker will be applied to, such as uncoated paper, laminated board, glass or tissue. Also check whether it must remain removable, resist handling, or remain firmly attached through storage and transport.
Consider the application step too. A small round sticker may be quick to apply by hand, while an unusually shaped label with exact alignment requirements can slow the packing line. Explore custom printed stickers when labels are a core part of the packaging system rather than an afterthought.
Quality Assurance and Sample Testing
A packaging project is only ready for production after the complete pack has been checked. Review the physical sample with the same contents, fillers, inserts and labels that will be used in normal assembly.
Do not rely solely on a digital artwork approval. Digital files can verify layout and copy, but they cannot show folding accuracy, material feel, closure fit, scuffing, ease of packing or product movement.
Use a practical sample review checklist
Inspect the sample for:
- Correct box dimensions and product fit
- Accurate folding, gluing and crease alignment
- A lid, sleeve, drawer or closure that functions consistently
- Placement and readability of logos, text and instructions
- Colour appearance under normal indoor and retail lighting
- Legibility of small text, barcodes or variable information
- Clean edges around foil, embossing, cut-outs and windows
- Insert stability and product protection
- Label adhesion and tag placement
- Damage risks from stacking, handling and opening
Where relevant, pack and unpack the box several times. Check whether the product catches on the insert, whether tissue tears too easily, whether a sticker lifts, and whether staff can assemble the pack without excessive adjustment.
Separate design approval from production approval
Treat approval as a series of decisions:
- Structural approval: dimensions, style, fit and insert layout.
- Artwork approval: spelling, logo files, colours, content and dieline placement.
- Pre-production approval: final materials, finishes and sample quality.
- Packing approval: correct product order, fillers, labels, cards and closure method.
Keep an approved master sample and a written packing guide. This makes future reorders and handovers easier, especially when different team members manage procurement, product packing and retail presentation.
Sourcing Decorative Fillers and Accents
Decorative elements complete the unboxing experience, but they should never make the pack harder to open, less protective or impractical to assemble.
Use fillers to control movement, frame the product or add texture. Use accents to create a sense of occasion. The best choice depends on the box size, product finish and brand direction.
Options to evaluate
- Tissue paper: versatile for wrapping and layering; test whether its colour transfers or catches on sharp edges.
- Shredded paper filler: useful for filling voids and softening the presentation; can become messy if overused.
- Paper crinkle fill: gives a more structured look and can support lightweight items.
- Fabric ribbon: creates a traditional gift feel, but adds tying time and needs consistent length control.
- Paper ribbon or belly bands: can offer a cleaner, more recyclable-looking presentation depending on the complete material mix.
- Printed cards: communicate a message, product instructions or brand story without overcrowding the outer box.
- Seals and tags: add a finishing touch and can simplify campaign-specific changes.
Avoid using filler as a substitute for an insert where the product needs firm positioning. A fragile, heavy or awkwardly shaped item may require a purpose-designed internal support rather than extra decorative material.
Also review disposal and reuse from the recipient’s perspective. A box filled with multiple small components can feel excessive and may make the customer work too hard to reach the product. Use only the elements that serve protection, communication or presentation.
For ideas around complete presentation formats, review gift packaging options alongside your product dimensions and packing process.
Calculating All-In Packaging Costs
The true cost of gift packaging is more than the quoted price of the box. Build an all-in cost model before choosing a design, especially where the pack has multiple components or must be assembled manually.
Include the following cost categories:
| Cost area | Items to include |
|---|---|
| Primary packaging | Box, sleeve, insert, dividers and printed wrap |
| Decorative components | Tissue, filler, ribbon, tags, stickers and cards |
| Finishing | Foil, embossing, lamination, special cuts and windows |
| Packing labour | Folding, inserting, wrapping, labelling, tying and checking |
| Packing consumables | Tape, seals, protective wrap and handling materials |
| Storage | Space needed for flat-packed or assembled components |
| Distribution protection | Outer cartons and any protection required beyond the gift box |
| Allowance for loss | Damaged, misprinted or incorrectly assembled components |
Calculate a cost per completed pack, not only a cost per component. A low-cost box can become expensive if it takes several minutes to assemble or requires separate loose parts that are easily lost.
Compare options on total value
When comparing quotations, make sure the proposals cover the same specification. Confirm:
- Quantities and whether pricing changes at different order volumes
- One-off setup, tooling or artwork charges, where applicable
- Included and excluded finishes
- Number of components per finished pack
- Packing state on delivery
- Sampling and revision process
- Tolerance for material, colour or dimensional variation
- Payment terms and commercial conditions
Use a simple decision matrix if several designs are under consideration. Score each option for presentation, product protection, unit cost, packing time, storage footprint, flexibility for future variants and expected waste. This makes trade-offs visible before they become expensive production changes.
Setting Up a Streamlined Assembly Process
Even an excellent packaging design can fail at the assembly stage if the process is unclear. Set up the packing sequence before ordering the final quantity, then trial it with the people who will actually prepare the gift packs.
The aim is repeatability: each recipient should receive the same complete, neat package.
Design the packing sequence
A typical sequence may be:
- Inspect the box and open or erect it.
- Place the insert or base layer.
- Add tissue, wrapping or protective material.
- Position the product and any accessories.
- Add card, tag or printed information.
- Close the box and apply seals, ribbon or sleeve.
- Conduct a final visual and contents check.
- Place the completed gift pack into the required outer packaging, if used.
Document this sequence with photographs or diagrams of the approved result. Specify the orientation of the product, amount of filler, tissue fold, sticker position and ribbon length. Vague instructions such as “pack neatly” produce inconsistent results.
Make the process easier to control
Set up workstations so components are available in the order they are used. Keep approved samples visible and separate completed packs from unassembled materials. Count components before and after each packing run to identify shortages or unusual waste early.
Consider these questions:
- Can one person complete the pack without repeatedly reaching for materials?
- Does the box need pre-folding or special handling?
- Are loose items likely to be omitted?
- Is the final check simple enough to perform consistently?
- Can the packed box be handled without damaging a finish or dislodging a label?
- Are campaign-specific components clearly separated from standard stock?
A more elaborate pack is not always a better pack. If a design needs extensive manual adjustment to look good, simplify the structure, reduce the number of loose elements or improve the insert.
Final Gift Packaging Checklist
Before placing a production order, confirm that you have:
- Defined the recipient, purpose and intended brand mood
- Approved a box style based on the real product dimensions
- Tested product fit with all inserts, tissue and accessories
- Selected materials and finishes that suit the intended use
- Checked artwork against the final dieline
- Chosen labels, stickers and tags that work with the box surface
- Reviewed a complete physical sample
- Verified applicable product, labelling and material requirements
- Calculated the cost per completed pack, including labour and protective outer packaging
- Written a clear assembly and quality-check process
- Retained approved artwork, specifications and a master sample for repeat orders
Thoughtful gift packaging is the result of coordinated design, structure, materials and assembly—not decoration alone. If you are preparing a specification for a new project, use this checklist to brief suppliers consistently and compare options on the finished pack rather than on the box in isolation. For background on a packaging partner’s capabilities and experience, you can also review XGolden Print’s company profile.
