
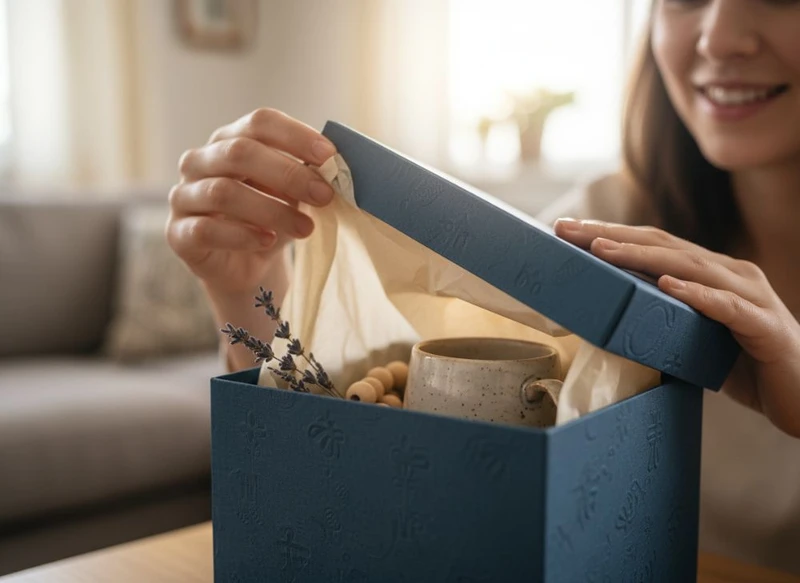
The art of the unboxing experience is about making the recipient feel that the product was chosen and prepared with care. A well-designed gift box does not need excessive materials or a high spend: a clear opening sequence, tactile layers, useful branding and a relevant personal detail can make an ordinary delivery feel considered.
For South African brands, retailers and e-commerce teams, the strongest approach is usually to build packaging around the product first. Protect it properly, make the opening intuitive, then add only the details that reinforce the occasion and your brand. This keeps the experience attractive without creating avoidable packing time, waste or cost.
Emotional Connection: Why Unboxing Matters
Gift packaging shapes expectations before the recipient sees the item. The exterior creates anticipation, while each internal layer gives the recipient a small moment of discovery. This is why packaging can feel more valuable than a plain shipping carton, even where the product itself has not changed.
A thoughtful unboxing experience usually communicates one or more of these messages:
- “This was selected especially for you.”
- “This brand pays attention to detail.”
- “This is a gift-worthy product.”
- “The item inside is protected and worth looking after.”
- “This occasion matters.”
The emotional effect comes from coherence, not from adding as many components as possible. A natural skincare gift, for example, may suit an understated uncoated box, soft tissue and a simple message card. A celebration hamper may call for brighter colours, a sleeve and a more expressive sticker. Both can work well when the materials, colours and message match the product.
Before specifying packaging, define the one feeling you want to create: calm, celebratory, premium, playful, festive or personal. Use that decision to guide the box style, print finish, filler and messaging.
Start with a practical opening sequence
Map the order in which the recipient encounters each component:
- Exterior carton, bag or mailer
- Branded seal, tape or sticker
- Main gift box
- Tissue, insert or protective filler
- Note, product card or offer card
- Product presentation
This sequence helps prevent a common mistake: placing every branded element in the same place. Instead, let each layer perform a different job. The outer layer protects, the closure creates anticipation, the interior presents the item, and the card provides the personal connection.
Layering Elements: Tissue Paper and Fillers
Tissue paper and fillers turn empty space into presentation space while helping to limit movement in the box. They should be selected for both appearance and practical fit. If a product shifts during handling, the unboxing experience can be undermined before the recipient reaches the final layer.
Tissue works best for wrapping, concealing and revealing smaller items. Fillers are more useful for supporting products, filling voids and creating a fuller look in larger boxes. Neither should be treated as a substitute for a properly sized box or a suitable protective insert for fragile goods.
| Layering option | Best suited to | Visual effect | Key consideration |
|---|---|---|---|
| Plain tissue paper | Apparel, accessories, cosmetics and smaller gifts | Clean and understated | Choose a colour that does not compete with the product |
| Printed tissue paper | Established brand presentation and seasonal gifting | Recognisable and polished | Keep the print pattern legible when folded |
| Shredded paper filler | Hampers, jars, multi-item sets and deeper boxes | Full, warm and gift-like | Ensure small items cannot disappear into the filler |
| Paper wrap or belly band | Flat products, folded textiles and boxed sets | Ordered and deliberate | Size it to stay secure without crushing the product |
| Custom-cut insert | Fragile, premium or unusually shaped products | Structured and protective | Confirm product dimensions and tolerances before production |
Use one dominant layer and one supporting layer where possible. For instance, wrap a product in tissue and add a small amount of filler underneath, rather than packing multiple decorative materials around it. Too many layers can look untidy, slow down packing and frustrate the recipient.
Also consider the end user. Powdery, loose or highly static fillers may be inconvenient around beauty products, electronics or dark-coloured apparel. For food, cosmetics or other regulated product categories, confirm that all packaging materials and inks are appropriate for their intended use and target market.
Personalisation: Adding Custom Notes or Label Stickers
Personalisation is often the most cost-efficient way to make a gift package feel individual. It can be as simple as a recipient name, a handwritten-style note, a limited-edition message or a label showing who packed the gift.
A custom note does not have to be long. The most effective messages are specific to the moment:
- “A little thank-you for you”
- “Made for your celebration”
- “Enjoy your new favourite”
- “With appreciation from the team”
- “Open, unwrap and enjoy”
For gifts sent directly to customers, leave space for a personal message from the purchaser when relevant. For corporate gifting, use a discreet card that supports the sender’s message without overpowering the product brand.
Custom labels are especially flexible because they can add seasonal or campaign details without changing the core box artwork. Explore custom sticker options for applications such as seals, name labels, tamper-evident closures, product identifiers and promotional messages.
Personalisation choices to compare
| Method | Best for | Advantages | Watch for |
|---|---|---|---|
| Printed message card | Consistent campaigns and gift sets | Clear brand control and easy inclusion | Avoid generic wording that feels impersonal |
| Handwritten note | Smaller runs and high-touch gifting | Human, individual feel | Allow realistic packing time |
| Variable-data label | Recipient names, events or short runs | Flexible and compact | Check spelling and data accuracy |
| Seasonal sticker | Promotions and holiday packaging | Updates stock packaging quickly | Keep it easy to remove where necessary |
| Gift tag | Occasion-led products | Familiar and decorative | Ensure the tag does not snag or tear in transit |
Do not make a note so sales-focused that it interrupts the gift moment. A discount code can be useful, but it is usually better placed on a separate insert rather than on the first card the recipient sees.
Designing Thematic Gift Boxes for Holidays
Thematic packaging can make a gift feel timely and intentional, but it should be designed with enough flexibility to avoid unnecessary leftover stock. Rather than redesigning the full box for every event, many brands use a reusable core box and adapt the presentation through sleeves, tissue, stickers, cards or ribbon.
For South African seasonal campaigns, consider occasions that are genuinely relevant to your audience, such as year-end gifting, Valentine’s Day, Mother’s Day, Father’s Day, birthdays, weddings, heritage-focused celebrations or business thank-you gifts. The theme should reflect the customer’s reason for giving rather than copying a seasonal look that has little connection to the product.
Build a theme using three elements
Choose no more than three visible theme cues:
- Colour palette: Keep it close to your usual brand colours, with one seasonal accent.
- Graphic device: Use a pattern, illustration, icon or short phrase consistently.
- Finishing detail: Add a sticker, tag, belly band, ribbon or printed tissue.
For example, a year-end gift box might retain the brand’s standard box, use a limited-run sleeve with a warm celebratory pattern, add matching tissue and include a short thank-you card. This feels campaign-specific without requiring a completely new packaging system.
Avoid themes that date too quickly, crowd the surface with messages or rely on very small print. Also make sure the product name, any essential instructions and any required information remain clear. Decorative elements should support usability, not hide it.
How to Keep Gift Packaging Costs Low
Low-cost gift packaging is not simply the least expensive box. The right choice balances material use, print complexity, storage, packing labour, product protection and the risk of damage. A package that is inexpensive to buy but slow to assemble may cost more overall.
The best cost-control measures are usually built into the design stage.
Use a standard box footprint
Choose a small number of box sizes that fit your most common products. Standardising dimensions can simplify storage, packing procedures and artwork management. Where several items are sold as a set, use inserts or filler to adapt a core box rather than creating a unique box for every combination.
Review custom packaging box formats with the actual product dimensions, including any lids, pumps, handles, cords or accessories. Allow for tissue and protective space without leaving excessive empty volume.
Print strategically
Use print where it will have the strongest impact. A simple logo on a well-chosen box colour can look more refined than a full-surface design with too many details. Consider whether a branded sticker, sleeve or card can deliver a campaign message more economically than changing the box artwork.
When requesting a quote or comparing suppliers, confirm:
- Box dimensions and whether they are internal or external measurements
- Board or paper type, thickness and finish
- Print colours, coverage and placement
- Minimum order quantity
- Whether inserts, tissue, stickers and assembly are included
- Whether artwork preparation or changes carry separate charges
- Packing format and storage requirements
- Sample, proofing or approval process
Costs can also rise through small design decisions: unusually shaped boxes, heavy coverage printing, multiple finishing techniques, complex inserts and many separate loose parts. Use these only where they serve a clear product or brand purpose.
Reduce waste without reducing the gift feel
Design for an appropriate amount of material. Oversized boxes, unnecessary plastic elements and excessive filler can make a package feel less considered, not more luxurious. Paper-based components can create a cohesive look, but assess the full packaging system, product protection and disposal guidance before making environmental claims.
If sustainability is important to your brand, state only what you can verify about the materials, components and local disposal options. Avoid broad claims based solely on appearance.
Creating Shareable Moments for Social Media
Packaging cannot force social sharing, but it can give customers a visually satisfying moment they may want to photograph or film. The key is a reveal that looks good from more than one angle and makes sense without explanation.
A shareable unboxing moment often includes:
- A recognisable outer mark, sticker or colour
- A neat opening action, such as lifting a lid or peeling a seal
- A contrasting tissue layer
- A centred product presentation
- A readable short message
- A small surprise, such as a card, sample or carefully placed accessory
Keep the design camera-friendly by making important details visible. Fine text, pale logos on pale backgrounds and busy patterns may be hard to recognise in a quick image or video. Likewise, a box that only looks good after several minutes of rearranging is less likely to appear naturally in customer content.
A small prompt can help, such as a tasteful social handle or campaign phrase on an insert. Do not assume customers will post, and avoid making the package feel like an advertising request. The gift experience must work even when it remains private.
The Power of Branded Tape and Exterior Stickers
Exterior branding makes the delivery feel intentional before the main box is opened. Branded tape and exterior stickers are particularly useful when a plain protective carton is needed around a more decorative inner gift box.
Branded tape can:
- Make a standard carton easier to recognise
- Reinforce brand identity during the first interaction
- Show where a box has been opened or resealed
- Support seasonal campaigns without changing every carton
Exterior stickers can:
- Identify a gift box or special edition
- Add an occasion-specific message
- Seal tissue or an inner box
- Direct the recipient to open from a particular side
- Separate product variants using a clear visual code
The exterior should still be practical. Do not place essential labels, handling information or required product details where a decorative sticker could cover them. Test adhesion on the actual board surface, especially where cartons may encounter heat, dust, humidity or repeated handling. A sticker that works on a smooth coated box may behave differently on textured or uncoated paper.
Use branded tape and stickers as the first signal of your identity, not as a substitute for a sound packaging structure. The parcel must remain secure and easy for the recipient to open without damaging the gift box inside.
Turning a Simple Paper Box into a Luxury Gift
Luxury is communicated through restraint, consistency and touch. A simple paper box can feel premium when its proportions fit the product, its material feels intentional and every detail aligns with the brand.
Start with the fundamentals:
- A good fit: The product should not rattle, tilt or look lost in the box.
- A clean closure: Lids, tabs, magnets or sleeves should operate smoothly and suit the intended use.
- A considered surface: Matte, textured, uncoated or subtly coated paper can each create a different impression.
- Limited colour use: One or two colours often feel more confident than a crowded palette.
- Clear logo placement: Give the mark enough space to be noticed.
- A refined interior: Tissue, an insert or a simple printed message can complete the reveal.
Special finishes such as embossing, debossing, foil or spot effects can add emphasis, but they work best as highlights. Applying several finishes at once may make the design look busy and can increase complexity and cost. Ask for physical samples or representative material swatches before committing, as colour, texture and shine can appear different from digital artwork.
For higher-value products, a rigid-style presentation box may be appropriate. For many other items, a carefully designed folding carton, sleeve or paper box can deliver a strong gift experience with less material and simpler storage. The right choice depends on product weight, fragility, expected shelf life, order volume and how the package will be distributed.
Common mistakes to avoid
- Selecting the box before measuring the final packed product
- Treating decorative filler as adequate protection for breakable items
- Overloading the unboxing with cards, inserts, ribbons and messages
- Choosing colours that make important text difficult to read
- Using seasonal artwork so specific that unused stock cannot be repurposed
- Forgetting to test the package after it is packed, closed and handled
- Making unverified claims about material sourcing, recyclability or sustainability
The best unboxing experiences feel natural because every element has a purpose. Begin with a suitably sized box, choose one memorable layer, add a personal or seasonal touch, and test the complete opening sequence with the actual product inside.
For a practical starting point, explore gift packaging formats and prepare a brief covering product dimensions, desired opening style, print requirements, order quantity and any inserts or labels. XGolden Print has 27 years of packaging and printing experience, which may be useful when discussing how to turn that brief into a workable packaging specification.
