
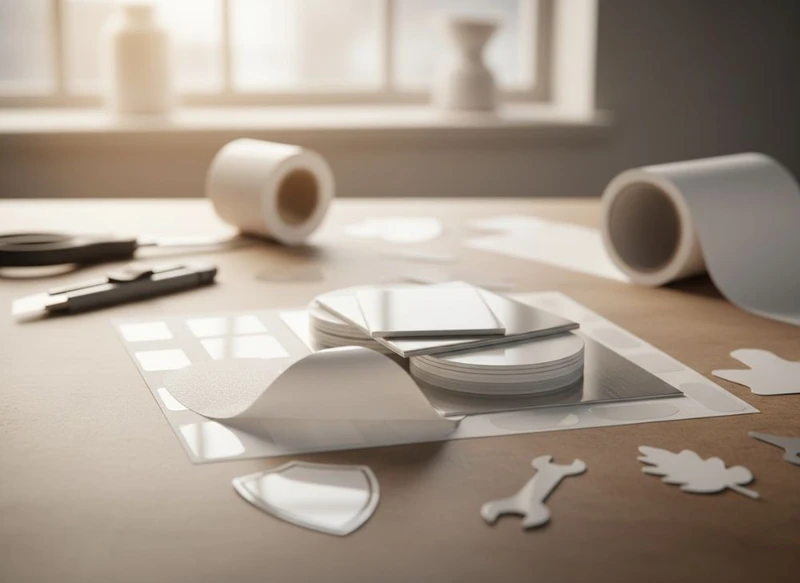
A successful label is a combination of the right face material, adhesive, finish and print method—not simply an attractive design. Start with where the product will be stored, how it will be handled, the surface it must stick to and whether the label needs to last for days, months or the full life of the product.
This guide to mastering label sticker printing helps South African product teams select practical specifications for jars, bottles, cartons, mailers, promotional items and retail packaging. Test the complete label on the actual product before committing to a full production run, particularly where moisture, refrigeration, heat, textured surfaces or curved containers are involved.
Selecting Durable Sticker Materials for Your Product
The label material, also called the facestock, is the visible printable layer. It influences how the label looks, feels, resists handling and conforms to the container. A material that prints beautifully may still be unsuitable if it wrinkles on a curved bottle or softens in a damp environment.
Choose the material based on the product journey rather than appearance alone.
| Material | Best suited to | Key strengths | Points to check |
|---|---|---|---|
| Uncoated paper | Dry goods, craft products, short-term promotions | Natural appearance, writable surface, economical option | Vulnerable to water, oil and abrasion unless protected |
| Gloss or semi-gloss paper | Retail labels, food jars, cartons, promotional stickers | Bright print, clean retail presentation | Confirm protection required for damp or heavily handled items |
| Textured or premium paper | Gift items, boutique products, premium packaging | Tactile character and distinctive appearance | Fine details and solid ink areas may reproduce differently on texture |
| White polypropylene (PP) | Bottles, personal-care products, chilled goods | Moisture resistance and flexibility | Confirm adhesive compatibility and finish requirements |
| Clear polypropylene | Clear containers and “no-label look” designs | Lets the product or container remain visible | White ink, adhesive visibility and application alignment require planning |
| Polyethylene (PE) | Squeezable bottles and flexible packs | Conforms well as the pack flexes | Match material flexibility to the container and adhesive |
| Polyester (PET) | Demanding industrial or long-life applications | Strong, stable film material | Confirm suitability for chemicals, heat and outdoor exposure for the specific use |
Match the label to the container surface
The same label can perform very differently on different substrates. Smooth glass, coated cardboard, HDPE plastic, low-energy plastic, flexible pouches and rough recycled board all present different bonding conditions.
Before specifying a label, identify:
- Container material: glass, metal, paperboard, plastic, flexible film or another substrate.
- Surface texture: smooth, matte, glossy, uneven, fibrous or ribbed.
- Container shape: flat panels are generally simpler than narrow diameters, sharp curves or tapered bottles.
- Product conditions: dry, refrigerated, frozen, oily, humid, hot-filled or exposed to direct sunlight.
- Handling: light shelf handling, frequent use, transport abrasion or outdoor use.
- Expected lifespan: a short campaign label does not need the same construction as a durable asset-identification label.
Paper labels can be a considered choice for dry, indoor products where a natural finish matters. Film labels are generally more appropriate where water resistance, flexibility or prolonged handling is important. “Waterproof” should never be treated as a material-only claim: adhesive, ink, coating, product conditions and label edges all affect real-world performance.
For packaging development, the label should also work visually with the pack. A custom printed box can carry detailed branding and product information, while a smaller label can provide a variable product name, flavour, batch detail or promotional message.
Consider the information your label must carry
A label needs enough space for legible information as well as branding. Reduce the risk of cramped artwork by listing all required content before choosing the size and shape:
- Product name and variant
- Ingredients or product details where applicable
- Directions, warnings or care information
- Barcodes, QR codes and serialised data
- Batch, date or variable information
- Contact details and brand identifiers
Requirements can differ by product category and selling channel. Verify the current labelling, language, safety and category-specific requirements that apply to your product in South Africa before approving artwork. Avoid reducing legally or commercially important text merely to make a label look less busy.
Understanding Permanent vs. Removable Adhesives
Adhesive determines whether a sticker stays secure, removes cleanly or is designed to be repositioned. The adhesive is usually hidden, but it is one of the most important parts of the specification.
Permanent adhesive
Permanent adhesive is designed to create a lasting bond. It is commonly used for product labels that should remain attached through normal distribution, display and customer use.
It may suit:
- Bottles, jars and tins
- Cartons and product boxes
- Branded seals
- Identification labels
- General retail packaging
“Permanent” does not mean it will bond equally well to every surface or withstand every environment. Adhesive performance can be affected by dust, moisture, oil, cold application temperatures, surface coatings and the shape of the product. Some permanent labels can also be removed with effort, while leaving adhesive residue or damaging the label.
Removable adhesive
Removable adhesive is intended to lift away without significant residue under the conditions for which it was designed. It can be useful for temporary offers, price stickers, event products, reusable containers and labels applied to surfaces that should remain unmarked.
Confirm the expected removal period. A removable adhesive may behave differently after extended storage, heat exposure, pressure or contact with certain coatings. It should be tested on the exact intended surface, not only on a sample sheet.
Repositionable and specialised adhesive options
Repositionable labels allow adjustment during application before the bond develops fully. They are useful where accurate placement matters, particularly for manual application on large-format or clear labels.
Specialised adhesives may be needed for challenging situations, such as:
- Cold or chilled application
- Freezer storage
- Rough or textured surfaces
- Recycled or low-energy plastics
- Oily containers
- High-tack requirements
- Tamper-evident applications
Do not assume a standard adhesive is suitable for these uses. Explain the application temperature, storage conditions, container material and desired removal behaviour when requesting a label specification.
Adhesive selection checklist
Ask these questions before approving labels:
- What surface will receive the label?
- Will the surface be clean, dry and at room temperature during application?
- Is the pack flexible, curved, textured or tapered?
- Will the product be chilled, frozen, exposed to humidity or used outdoors?
- Does the label need to stay permanently attached, remove cleanly or be adjusted during application?
- Could residue, lifting edges or damage to the container create a problem?
- Is a trial on finished production packaging required?
The Benefits of Roll Labels for High-Volume Application
Roll labels place individual labels on a liner wound around a core. They are a practical format for repeated application because labels can be dispensed in sequence by hand, with a bench dispenser or through compatible labelling equipment.
For high-volume product runs, roll labels can support more consistent placement than individually supplied stickers. They are often suitable for bottles, jars, tubes, cartons and other packs that receive a label in the same position repeatedly.
Key advantages include:
- Efficient handling: labels remain organised and ready for sequential application.
- Compatibility with application systems: rolls can be specified to suit compatible dispensing or labelling equipment.
- Cleaner storage: labels remain protected on their liner until needed.
- Repeatable orientation: artwork can be supplied in a winding direction that suits the application process.
- Less manual sorting: useful where many identical labels are being applied.
However, a roll label needs more information than a flat sticker sheet. The wrong roll construction can cause delays or waste, even if the printed label itself is correct.
Details to confirm for roll labels
When ordering roll labels, establish:
- Label width and height
- Shape and corner radius
- Core diameter required by the dispenser or applicator
- Maximum outer roll diameter the equipment can accept
- Winding direction and label orientation
- Gap between labels
- Whether labels are applied by hand or machine
- Whether the container is round, oval, tapered or flat
- Position of any barcode, seam, clear area or variable data
If application is automated, provide the equipment requirements rather than relying on a general roll format. It is also wise to trial a production-like roll with the intended product and applicator before ordering a large quantity.
For small batches, individually supplied stickers may be simpler to handle. For growing ranges, standardising label dimensions, roll orientation and application positions can make future product launches easier to manage.
Which Printer Type Is Best for Custom Stickers?
There is no single best printer type for every custom sticker project. The suitable process depends on run length, artwork complexity, material, colour requirements, finishing needs and whether information changes from one label to the next.
Digital printing
Digital printing is often a practical option for shorter to medium runs, multiple versions, seasonal designs and labels with variable content. It can suit projects where artwork needs to change frequently without creating a separate printing plate for each design.
Consider digital printing when you need:
- Several product variants in one range
- Versioned artwork or frequent design updates
- Personalised or variable data
- Shorter runs for product testing
- Detailed graphics and full-colour artwork
Ask what material and finishing combinations are available for the required label construction. Not every digital process supports every film, embellishment or special ink requirement in the same way.
Flexographic printing
Flexographic printing is commonly considered for repeat orders and larger-volume label programmes. It can be well suited to consistent artwork that will be printed repeatedly over time.
It may be appropriate where:
- The design is stable
- Quantities are high enough to justify setup requirements
- A repeatable colour approach is needed
- The selected material and finish are compatible with the process
Flexographic work may involve additional upfront setup, including plates. Evaluate the full programme, not only the unit cost: frequent artwork changes can alter the value of this option.
Screen printing and special print effects
Screen printing may be used where a stronger ink deposit, tactile element or selected special effect is needed. It is generally a specification-led choice rather than a default option. It can add visual impact, but it can also affect production complexity, cost and turnaround planning.
Thermal transfer printing for variable information
Thermal transfer printing is often used to add variable details such as dates, batch codes or barcodes to pre-printed labels. The ribbon, label stock and application environment must be compatible. Poor ribbon matching can lead to smudging, weak scans or reduced legibility.
A common approach is to pre-print the fixed brand artwork and add changing details later. Check that there is a suitable blank panel and that the variable print remains readable against the chosen label finish.
Ensuring Colour Accuracy on Your Label Sticker
Colour accuracy begins with a clear reference, suitable artwork and an agreed proofing process. A colour seen on a backlit screen will not look identical to ink on paper, white film, clear film or metallic material.
Use the following steps to reduce avoidable colour variation.
Build artwork for print
Supply high-resolution artwork in the format requested by the printer, with bleed, safe areas and die-cut lines clearly separated where required. Use vector graphics for logos, line art and text where possible. Ensure images are sufficiently high resolution at final print size.
Very small reversed text, thin rules and fine details should be reviewed at actual label size. Details that appear clear on a large monitor may fill in or become difficult to read on a small curved label.
Specify colours intentionally
Where exact brand colour matters, provide a recognised colour reference or approved physical sample where possible. Explain which colours are most critical, such as a signature brand shade or a colour-coded product range.
Remember that the base material changes the result:
- Uncoated paper can create a softer, more absorbent appearance.
- Glossy material can make colours appear more vivid.
- Clear film takes on the colour of the container or product behind it.
- Metallic stocks can alter transparent inks and colour perception.
- Textured materials can make solid areas appear less uniform than smooth stocks.
Approve a proof under realistic conditions
A proof helps identify artwork and layout issues before full production. Review it under sensible viewing conditions and, where possible, place it on the actual product. Check colour, spelling, barcode clarity, trimming, white ink areas, contrast and overall legibility.
A proof is also the time to inspect whether a matte or gloss finish supports the intended brand appearance. Do not approve based solely on screen appearance when colour is commercially important.
Troubleshooting Common Label Printing Issues
Many label problems are preventable when the material, adhesive, artwork and application method are considered together. When an issue occurs, identify whether it began during printing, finishing, storage or application.
Labels lifting at the edges
Edge lift can result from an unsuitable adhesive, contamination, a curved surface, tight label radius, insufficient application pressure or applying labels in conditions outside the adhesive’s preferred range.
Check that containers are clean and dry. Review the label shape, especially sharp corners, and test a more suitable adhesive or flexible film construction if the pack is highly curved or squeezable.
Wrinkles, bubbles or poor conformity
Wrinkles and air bubbles often occur where a stiff label is applied to a curved or tapered container, or where application is rushed. A flexible film label, adjusted label dimensions or a revised application method may help.
For manual application, establish a consistent technique and position guide. For automated application, inspect alignment, dispensing speed, pressure and product handling.
Smudging, scuffing or ink wear
Labels exposed to frequent touching, moisture, friction or packed contact may need a suitable protective coating or laminate. Matte finishes can have a premium visual effect, but their scuff resistance should be considered for dark, solid-colour designs.
Check whether the issue is caused by the printed surface, an incompatible thermal ribbon, insufficient curing for the selected process, or abrasion in the packing environment.
Unreadable barcodes and QR codes
A barcode or QR code can fail because it is too small, lacks contrast, is distorted by a curve, sits across a seam or is damaged by glare and scuffing. Leave adequate clear space around the code and avoid placing it where the label will wrinkle.
Test scannability from a sample on the final product. This is particularly important when codes are printed over coloured backgrounds, varnish, metallic stock or textured material.
Registration and die-cut alignment problems
Registration refers to the relationship between printed artwork and the cut shape. If a design uses borders, fine frames or artwork close to the edge, even minor movement can become noticeable.
Build sufficient bleed into the artwork and keep important text and design elements inside a safe area. Where possible, avoid extremely narrow borders around complex die-cut shapes.
Waterproof and Weather-Resistant Sticker Options
Water resistance is usually achieved through a label system rather than one feature. For products used in bathrooms, kitchens, chilled storage, outdoor settings or damp conditions, evaluate the facestock, adhesive, ink and protective finish together.
Film materials such as polypropylene, polyethylene and polyester are generally more moisture resistant than paper. A laminate or suitable varnish can provide additional surface protection, depending on the label construction and intended handling.
Choose protection for the actual exposure
Consider the difference between:
- Occasional splashes and routine wiping
- Condensation on chilled containers
- Humid storage conditions
- Repeated water exposure
- Oil, grease or product spillages
- Direct sun and outdoor use
- Temperature changes during storage and use
A label described as water-resistant may not automatically be suitable for outdoor exposure, prolonged immersion, harsh cleaning products or every chemical contact scenario. For demanding conditions, provide exact details of the exposure and request a material-and-adhesive recommendation for testing.
Lamination, varnish and finish options
A laminate is a protective film applied over the printed surface. It can be gloss, matte or soft-touch depending on the available construction. A varnish is a coating that can protect the print and influence the surface appearance.
Gloss often strengthens colour contrast and offers a smooth retail finish. Matte reduces glare and can create a restrained appearance. Neither should be selected on appearance alone: test scuffing, moisture exposure and intended handling.
For premium packs, label finish should complement the wider presentation. For example, a coordinated label and gift packaging can use contrasting tactile elements without making every surface glossy or heavily embellished.
Die-Cut Precision: Making Complex Shapes Possible
Die-cutting creates the finished label shape. It allows labels to move beyond simple rectangles into circles, ovals, custom silhouettes, seals, rounded corners and shapes that follow a package feature.
A well-chosen die-cut can improve shelf recognition and help a label fit the available panel on a container. It should still be practical to print, apply and remove from the liner.
Design for a reliable cut shape
Complex shapes are possible, but excessively intricate features can create avoidable risks. Very narrow points, tiny internal cut-outs, sharp corners and thin connecting areas may be difficult to weed, dispense or apply consistently.
For a practical die-cut specification:
- Use rounded corners where the application environment allows.
- Avoid extremely thin shapes that may tear or lift.
- Keep important text well inside the cut line.
- Allow adequate bleed beyond the final trim edge.
- Consider how the label will peel from its backing.
- Check whether the shape suits a curved container.
- Review the shape at actual size, not only enlarged on screen.
Add functional features where needed
Die-cutting can also support practical packaging features, including tamper seals, neck labels, opening tabs and multi-panel constructions. These should be developed with the pack’s material, opening method and user handling in mind.
A decorative shape should not interfere with barcode scanning, mandatory content, container closure or efficient application. When the label acts as part of a packaging system, assess it together with the carton, bottle or other pack component—not in isolation.
FAQ
Should I choose paper or film labels?
Choose paper for dry, indoor products where a natural or traditional appearance is appropriate. Choose a film label when moisture resistance, flexibility or more durable handling is important. Confirm the adhesive and finish as part of the decision.
Can clear labels be used on any product?
Clear labels can work well on transparent or coloured containers, but the background affects every printed colour. White ink may be needed behind artwork to retain colour strength, and adhesive visibility should be checked on the final container.
Is matte or gloss better for stickers?
Neither is universally better. Gloss can make colours appear stronger and is easy to wipe, while matte can reduce glare and provide a more understated look. Consider scuff resistance, readability and the product’s intended presentation.
What should be tested before a full label order?
Test application, adhesion, edge lift, removal behaviour where relevant, colour, barcode scanning, legibility, finish durability and performance under actual storage and handling conditions.
The strongest label specification is one that considers the product, container, environment and application process together. Begin with a clear product brief, request samples or proofs where appropriate, and use the final packaging rather than a substitute surface for testing. To explore format options, review XGolden Print’s custom sticker solutions and align the label with the rest of your packaging specification.
