
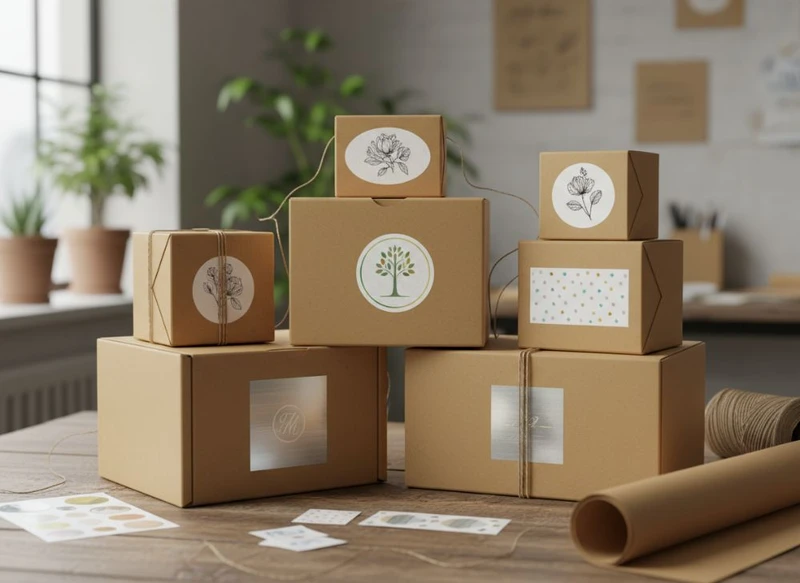
Plain paper boxes can become considered, gift-ready packaging with a well-designed label sticker. The most effective approach is to choose a box surface your label can adhere to, define one clear branding goal, and apply a sticker that looks intentional rather than like an afterthought.
For brands testing a new product, managing several ranges or creating limited gift packs, this method keeps the outer box simple while allowing the presentation to change. This guide explains how to use label stickers to transform plain paper boxes into branded gifts, including material choices, placement, security and storage considerations.
Cost-Effectively Branded Packaging with Stickers
Using stickers on plain boxes separates the box from the branding layer. Instead of printing every design directly onto packaging, you can use a neutral box across multiple products and differentiate each one with a label.
This can be a practical option when:
- You have a small or changing product range.
- Gift sets are assembled in different combinations.
- Product names, ingredients, variants or seasonal messages change regularly.
- You need to trial packaging artwork before committing to fully printed boxes.
- You want one unbranded box format for online orders, retail displays and promotional packs.
A label should still feel integrated with the box. Select the box colour, sticker size and artwork as one system. For example, a warm white kraft-style box may suit an uncoated label with simple black artwork, while a smooth white box can support crisp colour graphics or a refined metallic detail.
Before ordering, assess the whole package rather than the label in isolation:
| Decision point | What to check | Why it matters |
|---|---|---|
| Box surface | Smoothness, coating, texture and dust levels | These affect adhesion and the final appearance. |
| Label material | Paper, polypropylene, vinyl or another suitable substrate | The material must suit handling, moisture exposure and desired finish. |
| Product conditions | Refrigeration, heat, oils, friction or humidity | Labels can lift, wrinkle or scuff when the wrong material or adhesive is used. |
| Application method | Hand application or labelling equipment | The label format and release liner should work with your process. |
| Box design | Opening flaps, seams and panel dimensions | Avoid placing labels where they crease, split or obstruct opening. |
For a more permanent premium result, branded cartons may be the better choice. However, stickers can be especially useful for short-lived campaigns, product testing and gift bundles. Compare the dimensions and construction options available for custom packaging boxes before settling on a standard box size.
Choose a label finish that matches the gift
A finish communicates something before the recipient opens the box. It should support the product’s character, not compete with it.
- Uncoated paper labels suit natural, handmade or understated gifting concepts. They are generally best kept away from moisture and greasy handling.
- Gloss labels can make saturated colours and photographic elements appear more vivid. They suit playful products and high-colour designs.
- Matt labels reduce glare and give restrained artwork a polished look.
- Clear labels can make a logo appear printed directly onto a smooth box, but any air bubbles, fingerprints or uneven application will be more visible.
- Foil or specialty finishes can add a gift-like accent when used selectively, such as on a monogram or short message.
Request samples or run a small application check when using textured board, recycled-looking paper or a coated box. Adhesion and visual contrast can differ considerably from a digital proof.
The Strategic Placement of a Logo Label
Place the main logo label where a recipient will notice it naturally while opening, holding or displaying the box. In most cases, the centre of the lid, the upper front panel or a narrow closure strip are useful starting points.
The right placement depends on what the label needs to do.
Lid-centre placement
A centred lid label creates an immediate branding moment and works well for gift boxes with generous flat top panels. Use it when the logo or gift message is the primary visual element.
Keep an appropriate clear margin around the label. A sticker that sits too close to an edge can look misaligned even if it has been applied accurately.
Front-panel placement
A front-facing label is useful when boxes will sit upright on a shelf, in a hamper or in a product photograph. It can carry a product name, variant, short descriptor and logo without interrupting the opening experience.
Closure-seal placement
A label that bridges the lid and base can act as both branding and a tamper-indication feature. It is useful for tuck-top boxes and folded gift cartons, but it needs enough overlap across the opening to tear when opened.
Side-panel placement
A side label suits boxes with a carefully designed blank lid, or where the label carries practical information such as a scent, flavour, set contents or care instructions. It can be less prominent, so ensure the logo remains recognisable at the likely viewing distance.
Avoid placing a label over:
- A fold, corner or perforation
- A box seam that may separate
- A rough or heavily textured area
- A barcode or mandatory product information, where applicable
- A panel hidden by a sleeve, ribbon or packing method
Create a simple placement guide for staff or co-packers. It can show the exact panel, distance from the edge and orientation. Consistent application is often what makes a simple box feel professionally branded.
Using QR Codes on Stickers for Marketing
A QR code on a label can connect a physical gift box to useful digital content. The destination should give the recipient a reason to scan, rather than simply repeating the product name already printed on the package.
Suitable destinations may include:
- Product-use instructions or assembly guidance
- A gift message, recipe, tutorial or styling idea
- Product registration, where relevant
- Reorder information
- A campaign landing page
- A short welcome page for gift recipients
- Sustainability or disposal guidance, provided the information is accurate and maintained
Keep the QR code separate from busy artwork. It needs clear contrast, a quiet margin around the code and a size that can be scanned reliably under normal conditions. Test it from a printed production sample, not only from a screen.
Add a short call to action such as “Scan for gift ideas” or “Scan to discover the story”. Without context, many recipients will not know what they will receive by scanning.
QR-code checks before production
Before approving a label run:
- Confirm that the destination page works well on mobile devices.
- Test the code on the final label size and finish.
- Check scans in bright and low indoor light.
- Make sure artwork, foil effects or varnish do not interfere with code contrast.
- Use a destination URL you can update or manage over time.
- Confirm that the landing page remains relevant after a campaign ends.
Do not rely on a QR code as the only source of essential product, safety or usage information. If information must remain accessible without a phone or internet connection, include it in a suitable printed format and verify applicable requirements for your product and target market.
Seasonal Updates with Changeable Labels
Seasonal labels make a standard box work harder. A base box can be used throughout the year while stickers introduce festive colours, a limited-edition flavour, a corporate gifting message or an occasion-specific design.
This approach can reduce the need to hold many versions of pre-printed packaging, but it requires artwork discipline. Keep the core brand elements consistent: logo position, typeface, product hierarchy and colour family should still make the product recognisable.
A practical structure is to create three label layers:
- Core label: Brand, product name and essential information.
- Campaign label: A removable or changeable design for a seasonal range, launch or event.
- Fulfilment label: Variable information such as a batch reference, recipient name or order detail, where needed.
For example, a neutral gift box might use a permanent front label for the product range and a small lid sticker to introduce a seasonal message. When the promotion ends, the box remains suitable for the next campaign.
Be cautious with date-sensitive artwork. Avoid producing a large quantity of labels with specific dates unless you are confident they will be used within the intended period. Generic messaging, such as “A gift for the season”, can offer more flexibility than an event-specific design.
For products intended to be given as presents, explore custom gift packaging early in the design process. The closure, reveal and internal fit may influence whether a temporary sticker is enough or whether the box itself needs a more gift-focused format.
Sticker Shapes That Draw Attention
Sticker shape affects both visibility and application. A distinctive shape can make plain packaging memorable, but it must remain practical for the available space and how the box is handled.
| Shape | Best use | Considerations |
|---|---|---|
| Rectangle | Product details, logos and QR codes | Efficient use of space; align carefully with box edges. |
| Square | Bold logo marks and short messages | Creates a neat, contemporary focal point. |
| Circle | Seals, monograms and simple icon-based branding | Less suitable for longer copy. |
| Oval | Premium, traditional or food-gift styling | Works well across narrow front panels. |
| Die-cut custom shape | Brand symbols, illustrated gifts or standout promotions | Can add character but may require more careful application and storage. |
| Long strip | Closure seals and tamper-evident uses | Must bridge an opening or seam without excessive tension. |
Choose the shape after deciding what must appear on the label. A round sticker may look attractive, but long product names, several icons and a QR code will be difficult to arrange legibly in a circular space.
For first-time projects, standard rectangles, squares and circles are usually easier to apply consistently. Custom shapes are most effective when the silhouette has a clear connection to the brand, such as a recognisable icon, not simply because an unusual shape is available.
Review custom sticker options alongside your box dieline or dimensions. Confirm the final cut shape, material, adhesive, finish, roll or sheet format, and any tolerance requirements before placing a larger order.
Label as a Security Seal: Tamper-Evident Design
A label can provide visual evidence that a box has been opened when it is designed as a seal. It should not be described as tamper-proof: a sticker cannot prevent every form of interference. Its role is to show visible disruption when the packaging is opened.
For a paper box, position the seal so that it crosses the opening point. When the lid is lifted, the label should tear, split or leave visible evidence that the closure has been disturbed.
Useful design considerations include:
- Use a narrow strip label with enough length on both sides of the opening.
- Keep important copy away from the expected tear line.
- Consider a perforation, destructible stock or void-style adhesive only after checking its suitability for the box material and intended conditions.
- Make the seal obvious enough that recipients understand its purpose.
- Test opening the actual assembled box, including any tissue paper, sleeve or ribbon used with it.
- Confirm whether the seal needs to remain functional after transport, storage or temperature changes.
A seal is especially useful for products where customers expect an untouched presentation. However, it can frustrate a recipient if it damages an elegant lid or leaves adhesive residue. Test both the security effect and the unboxing experience.
If your product falls into a regulated category or carries required consumer information, verify current South African labelling, packaging and product-specific requirements independently. A branding seal does not replace information that must be displayed elsewhere.
Maximising Impact with Minimalist Sticker Art
Minimalist sticker design can make a plain box look deliberate and premium without demanding a large print area. The principle is simple: give one or two visual elements enough space to be noticed.
A strong minimalist label often contains:
- One clear logo or wordmark
- A short product or gift name
- A limited colour palette
- A simple symbol, line illustration or monogram
- Generous empty space around the key element
Avoid shrinking every available detail onto one small sticker. Tiny copy, multiple taglines, several social icons and decorative patterns can turn an elegant label into visual clutter.
Build a clear information hierarchy
Decide what a recipient should see first, second and third.
- First: the brand or gift message
- Second: the product name, range or occasion
- Third: supporting information, such as a variant or QR call to action
Use size, weight and contrast to establish that order. If the label is primarily decorative, move detailed content to a side panel, insert card or secondary label.
Minimalism still requires production awareness. Fine white lines can disappear against light board, delicate type may fill in on textured paper, and a very pale ink may have insufficient contrast. A physical sample on the intended box is the most useful check.
Bulk Ordering and Storage Tips for Labels
Bulk ordering can simplify repeat packing, but only when the label design, adhesive and storage conditions are stable enough for future use. Order quantities should be based on more than the unit cost.
Consider these questions before choosing a volume:
- Is the artwork likely to change within the next product cycle?
- Will product details, ingredient statements, instructions or campaign dates need updating?
- Can the label be used across several box sizes or only one format?
- Does your packing team have dry, clean storage space?
- Will labels be applied by hand or equipment?
- How much overage is sensible for set-up, handling and application errors?
Store labels in their protective packaging in a clean, dry area away from direct sunlight, excessive heat and significant humidity changes. Keep rolls upright or according to the supplier’s handling guidance, and avoid compressing them under heavy items. For sheets, store them flat to reduce curling.
Use a first-in, first-out system and label each carton with the artwork version, product range, quantity and receipt date. This reduces the chance of applying an outdated seasonal design or incorrect variant label.
Before a large packing run, inspect a small sample from the stored stock. Check whether the labels release cleanly from the liner, adhere evenly and still scan correctly if they include QR codes. If performance is important to your operation, agree in advance with your supplier on the specifications and checks that matter for your application.
A practical checklist before you apply labels
Use this final checklist to turn a plain box into a branded gift without avoidable rework:
- Confirm the finished box dimensions and the available flat label area.
- Choose a label material and adhesive suited to the box surface and handling conditions.
- Keep the central message clear and readable at the intended viewing distance.
- Place the sticker away from folds, seams and required product information.
- Print and apply a production-representative sample before approving full quantities.
- Test opening, stacking, packing and normal handling.
- Scan every QR-code version from the finished label.
- Create an application guide for anyone packing the boxes.
- Separate evergreen label stock from date-specific or campaign stock.
- Keep an approved artwork version record.
The best sticker-led packaging system is not necessarily the most elaborate one. It is the one that fits the product, applies consistently and makes the recipient feel that the gift was prepared with care.
If you are planning a box-and-label project, start by defining the box size, label placement and unboxing purpose together. XGolden Print’s company profile provides further context on its packaging and printing experience when you are ready to compare production options.
