
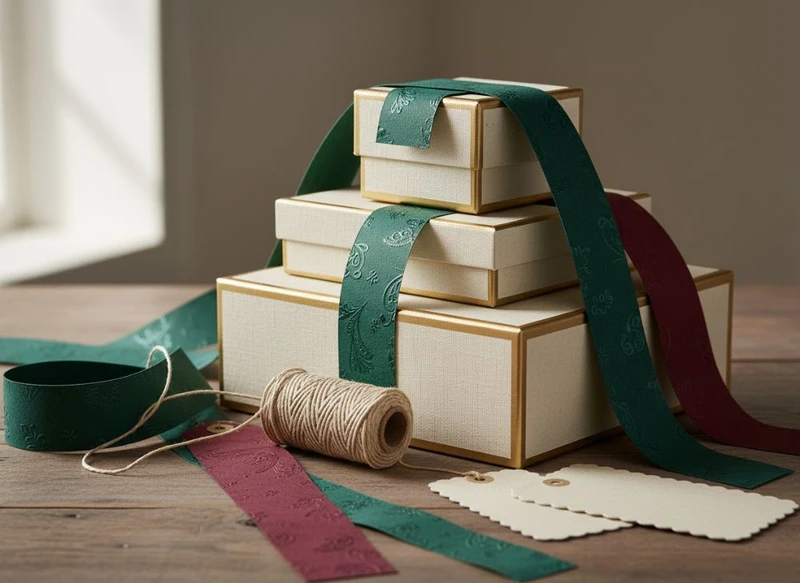
Creating luxury gift packaging with budget-friendly paper boxes and labels is mainly about making a few elements feel intentional: a well-proportioned box, restrained colour use, neat finishing and secure product presentation. You do not need an elaborate structure or excessive decoration to create a premium unboxing experience.
For South African brands, retailers and e-commerce teams, the most cost-conscious approach is usually to start with a standard paper box style, then concentrate the budget on the details customers touch and notice first: the opening method, insert, tissue, label and print finish. Before production, request and approve a physical sample or mock-up, especially where colour, fit and closure are important.
The Secret to High-End Cardboard Boxes
A premium-looking cardboard box begins with structure, not decoration. A box that is too large, easily crushed or poorly fitted around the product can undermine even the best artwork. Choose a box style that protects the item while leaving enough room for tissue, an insert or a small message card.
Rigid boxes are often associated with luxury gifting because they feel substantial and can have a separate lid or magnetic closure. However, folded paperboard boxes can also look refined when they use clean die-cutting, a suitable board grade and a carefully considered print design. They are often a practical option where storage space, shipping volume or budget is a concern.
When specifying a box, assess these basics:
- Product dimensions: Allow for the product, protective material and easy removal. Avoid a loose fit that lets items move during handling.
- Product weight: Heavier items need a stronger box and, in many cases, a supportive insert.
- Box orientation: Decide whether the product should open from the top, side or front. The opening should reveal the product attractively.
- Surface area for branding: A simple lid or front panel may be enough for a logo, while side panels can hold instructions, product details or a message.
- Finish selection: Matte coatings, soft-touch-style surfaces, spot gloss and textured papers can all change the perceived quality. Confirm compatibility with the chosen board, print method and intended use.
- Practical handling: Consider stacking, storage, transport and whether the packaging will be displayed in a shop or sent directly to customers.
The strongest luxury effect usually comes from consistency. For example, a dark uncoated box with a crisp white label can feel more deliberate than a glossy box carrying several competing colours, icons and promotional messages.
For structural options and specification considerations, explore custom printed boxes suited to the product’s size, weight and presentation requirements.
Where to save without making the box look cheap
Cost savings are most effective when they remove unnecessary complexity rather than visible quality. Consider using:
- A standard-size or simple folding box rather than a highly customised structure.
- One or two print colours instead of full-surface artwork.
- A premium label or foil detail on the lid instead of an expensive finish across every panel.
- A well-designed paper insert instead of a more complex multi-part presentation tray.
- A single unboxing message card rather than printing copy on multiple internal surfaces.
Avoid reducing board strength simply to lower unit cost. If corners collapse or the lid no longer fits correctly, the packaging may not protect the product or represent the brand as intended.
Using Custom Inserts for a Premium Feel
An insert gives the product a defined place inside the box. It stops smaller items from shifting, presents the contents in an orderly way and makes the opening feel considered. In many gift packs, an insert creates more perceived value than extra printing on the outside.
Paperboard inserts are often a versatile starting point. They can be folded, die-cut or layered to create sections for products, accessories, samples or cards. They also make it easier to keep the packaging material family relatively simple where that suits the product and disposal expectations.
Choose an insert according to what it needs to do:
| Insert type | Best suited to | Main benefit | Points to check |
|---|---|---|---|
| Folded paperboard cradle | Bottles, jars and boxed products | Lightweight support with a neat appearance | Product stability and tolerance around corners |
| Die-cut paperboard tray | Small sets, accessories or shaped items | Clear product positioning | Accuracy of cut-outs and ease of product removal |
| Layered card divider | Multi-item gift sets | Separates products and reduces contact | Whether dividers stay in place during handling |
| Tissue wrap with paper base | Softer or lightweight products | Gentle presentation with lower structural complexity | Adequate protection for the product |
| Foam or moulded protective insert | Fragile, heavy or highly shaped products | More controlled cushioning | Material choice, fit and end-of-life requirements |
The best insert does not have to grip the product tightly. It should hold the item securely enough for normal handling while allowing the recipient to remove it without struggling or damaging the packaging.
Test the complete pack, not only the insert. Add all intended components, close the box, turn it in different directions and check whether the product remains stable. If the pack will be shipped, review it with the outer protective packaging too. Presentation packaging and transit packaging may need to perform different roles.
Elevating Simple Designs with a Gold Foil Sticker
A gold foil sticker is one of the most efficient ways to add a premium focal point to a simple gift box. Used sparingly, it can draw attention to a logo, monogram, seasonal message or seal without requiring metallic printing over the full packaging surface.
Gold is not the only option. Silver, copper, black foil or a coloured metallic effect may better suit the brand palette. The key is contrast: the label should be easy to read and should complement the box material rather than disappear into it.
A foil sticker works particularly well when:
- The box is a single solid colour or has a quiet pattern.
- The logo is simple enough to remain clear at the chosen sticker size.
- The sticker is used as a seal over a sleeve, tissue fold or box closure.
- The design leaves sufficient clear space around the label.
- The placement is repeatable during packing.
Keep fine lines, very small type and intricate artwork under review. Foil details can lose clarity when the artwork is overly delicate or when the label is too small. Ask for a proof that reflects the final label size, material and finish rather than approving artwork only on a screen.
For brand seals, product labels and decorative finishing, review custom sticker options alongside the box material. Confirm the adhesive is appropriate for the intended surface, handling conditions and application method.
Use one visual hero
A luxury gift pack needs a visual hierarchy. The foil sticker can be the hero element, which means other components should support it rather than compete with it. Pair a metallic label with a plain ribbon, quiet tissue paper and minimal external copy. If the box already has a strong full-colour design, a less prominent label may be the better choice.
Choosing the Right Box Closure: Ribbon or Magnetic
The closure shapes the first physical interaction with the gift. It should be appropriate for the product, the box structure and the budget—not merely decorative.
Ribbon closures add softness and ceremony. They can suit beauty, apparel, confectionery, event gifts and seasonal ranges, especially when the recipient is expected to untie the packaging. A ribbon can also turn a straightforward lid-and-base box into a more gift-like presentation.
Magnetic closures offer a clean, modern opening experience and can help keep a book-style box closed. They are often selected for presentation sets, corporate gifts and products intended to be kept after opening. However, they add complexity and require close attention to alignment, board construction and closure strength.
| Closure option | Premium impression | Budget impact | Best use | Potential drawback |
|---|---|---|---|---|
| Tuck flap | Clean and functional | Usually lower | Folding cartons and lighter gift packs | Can feel more retail-focused if not well finished |
| Lid and base | Classic and versatile | Moderate, depending on construction | Candles, sets, apparel and keepsake-style packs | Requires careful lid fit |
| Ribbon tie | Personal and celebratory | Varies with ribbon type and application | Gifting, limited editions and special occasions | Adds packing time and can snag or crease |
| Magnetic flap | Sleek and substantial | Often higher | Book-style presentation boxes | Requires accurate construction and can complicate material choices |
| Sleeve | Minimal and contemporary | Moderate | Branding a plain inner box or creating a reveal | May slide or scuff if tolerances are poor |
| Sticker seal | Simple and branded | Often cost-effective | Tissue wraps, sleeves and mailer-style gift packs | Depends on consistent placement and adhesive performance |
Before choosing, think about who packs the product and how frequently. A ribbon may look excellent in a small hand-packed run but be less efficient where many units must be assembled. A sticker seal may offer a more repeatable result while still creating a neat reveal.
Design Principles Used in Premium Gift Packaging
Premium packaging design is usually restrained, legible and coherent. It gives the eye a clear path: identify the brand, understand the gift or product, then discover the details during opening.
Use these principles to guide the brief:
Limit the colour palette
One dominant colour plus a neutral and one accent is often enough. Deep tones, warm neutrals and clean white can all look premium when the printing is controlled. More colours do not automatically add more value.
If brand colours are important, supply the correct colour references and approve a production proof where colour accuracy is critical. Colour can vary depending on the paper, coating, print process and viewing conditions.
Make type do real work
Choose type that remains readable at the actual printed size. Reserve decorative fonts for a short name, collection title or message. Product information, usage notes and contact details should be easy to scan.
Avoid placing fine text too close to folds, cut lines, corners or the edge of a label. These areas are more vulnerable to slight production variation and wear.
Use empty space deliberately
Clear space around a logo or central message makes the pack feel calm and confident. Filling every panel with product claims, patterns or small graphics can make even high-quality materials feel busy.
Match finish to the brand position
A glossy surface can be suitable for colourful, energetic products. Matte or lightly textured papers often suit understated or artisan-style brands. There is no universally “luxury” finish; the best choice is the one that supports the product’s story and is practical for handling.
Design the full unboxing sequence
Think beyond the lid:
- What does the customer see first?
- How does the box open?
- Is there tissue, a seal or a message card before the product is revealed?
- Does the insert frame the product neatly?
- Can the recipient repack the item or reuse the box?
This sequence should feel straightforward. If customers have to pull tabs, remove multiple layers or struggle with tight inserts, the premium effect can quickly fade.
The Role of Tissue Paper and Gift Tags
Tissue paper softens the transition between the box and product. It can conceal the contents until the moment of opening, protect delicate surfaces from rubbing and introduce a secondary brand colour or pattern.
Plain tissue is often the most flexible option because it works with a wide variety of boxes and labels. Printed tissue can add personality, but it should remain subordinate to the main brand elements. If the box, sticker and tissue all carry bold graphics, the result may feel cluttered.
Gift tags add a human touch without permanently printing a seasonal message onto every box. They are useful for:
- Short gift messages
- Limited-edition collection names
- Product care notes
- Personalisation fields
- Seasonal greetings
- A simple “packed for you” message
Keep the tag proportionate to the box. An oversized tag can cover the logo or become awkward during transport. Choose a hole position, string or ribbon attachment that does not interfere with the closure.
For a coordinated starting point, gift packaging solutions can help inform the combination of box style, tissue, tags and presentation details. Confirm which components are suitable for your product and packing process before finalising artwork.
Focus on Detail: Precision in Label Sticker Placement
A label that is slightly crooked, off-centre or placed across a fold can make otherwise polished packaging look rushed. Because labels are visible and tactile, placement accuracy matters as much as the label design.
Build a clear placement rule into the packaging specification. Rather than simply stating “place on lid”, define the position in relation to edges, folds or a printed guide. Include a reference image showing the intended orientation.
For consistent label application:
- Leave a flat, unobstructed area for the sticker.
- Keep labels away from folds, seams, corners and heavy texture where possible.
- Specify the label size and orientation.
- Allow enough margin around the label to make small placement differences less obvious.
- Check that the label does not cover mandatory product information or a barcode where these are required.
- Apply labels to clean, dry surfaces and confirm adhesion on the final box material.
- Use a simple jig, guide or marked packing surface for repeatability where labels are applied by hand.
A seal label placed over tissue needs a different adhesive requirement from a product label placed on a smooth coated box. Similarly, a label intended to be removed cleanly has different needs from one intended to remain in place. Explain the intended use when requesting labels.
How to Price Your Premium Gift Packaging
Pricing premium gift packaging starts with the total pack, not the box alone. A low-cost box can become expensive once inserts, labels, tissue, tags, assembly and wastage are added. Conversely, a slightly stronger or better-designed box may reduce the need for extra filler or complicated decoration.
Build your packaging cost model around these categories:
| Cost area | What to include |
|---|---|
| Structural components | Box, lid, sleeve, insert, divider and protective elements |
| Decoration | Printing, foil details, coatings, labels and embellishments |
| Packing materials | Tissue, ribbon, tags, seals and message cards |
| Setup and development | Artwork preparation, tooling where applicable, sampling and revisions |
| Assembly | Folding, inserting, wrapping, labelling and tying ribbon |
| Storage and handling | Space used by flat or assembled packs, damage risk and stock management |
| Wastage allowance | Misapplied labels, damaged components and extra units needed during packing |
| Outer protection | Any packaging needed to protect the gift pack before it reaches the customer |
To set a selling price, first calculate the fully assembled packaging cost per unit in rand. Then decide how much of that cost the product margin can support and whether the packaging is included in the normal product price, offered as a paid gift-wrap option or reserved for selected bundles.
Compare options by value, not unit price
When considering two packaging options, compare the same complete outcome. For example, a plain box plus premium label and tissue may be a better-value choice than a fully printed box if both deliver the desired presentation. But if the label takes too long to apply or does not remain aligned, the apparent saving may disappear in assembly costs.
Ask suppliers to clarify:
- Minimum order quantities for each component
- Whether prices include printing, finishing, tooling or setup
- How artwork changes affect cost
- Whether components are supplied flat or assembled
- Any tolerances that may affect insert fit or label placement
- What sampling or proofing is available before a full run
- Whether pack assembly is included or must be managed separately
Do not finalise a design solely from a digital visual. Test an assembled sample with the real product, tissue, insert, closure and label. This is the clearest way to see whether the pack looks premium, functions correctly and remains within the intended cost.
Common mistakes to avoid
The most frequent problem is trying to make every component look luxurious at once. This can lead to excessive finishes, mixed materials and an unclear brand message. Instead, choose one or two premium cues and execute them carefully.
Other avoidable mistakes include:
- Selecting a box before confirming the final product dimensions.
- Using an insert that looks attractive but does not hold the item securely.
- Choosing ribbon or magnets without considering packing time.
- Making labels too small for the logo or too large for the available surface.
- Printing critical information too close to edges, folds or closures.
- Forgetting to assess the outer packaging needed for e-commerce orders.
- Ordering components separately without testing how they work together.
- Treating colour, texture and material compatibility as assumptions rather than items to approve.
FAQ
Can a folding carton look luxurious?
Yes. A folding carton can create a premium impression when the board is appropriate for the product, the structure is neat, the print design is restrained and the product is presented well inside. A quality label, tissue wrap or tailored insert can add impact without requiring a rigid box.
Is gold foil always the best choice for luxury packaging?
No. Gold foil suits many brands, but it should support the visual identity rather than define it. Silver, copper, embossing, a textured paper or a carefully selected matte finish may be more appropriate depending on the product and audience.
Should gift packaging be included in the product price?
That depends on your margin, product position and customer expectations. Some brands include it for selected ranges, while others offer it as an optional add-on. Calculate the full assembled cost before deciding, including labour, protective materials and expected wastage.
What should be checked before ordering a full packaging run?
Confirm the product fit, insert performance, artwork, colour expectations, closure alignment, label position, ease of assembly and the complete pack cost. If any claims, labelling or material requirements apply to your product category, verify them for the intended South African market before production.
A practical next step is to create a one-page packaging brief with your product dimensions, desired unboxing sequence, box style, finish priorities and target assembled cost. XGolden Print has 27 years of packaging and printing experience, and its company background may be useful when evaluating a packaging partner for your next specification.
